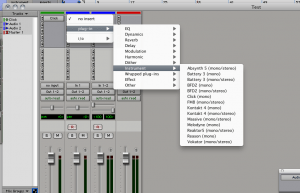
This may seem like a pretty trivial thing to do for a moderate user of ProTools, however it is something that has cropped up time and time again with new users of the software. It isn’t the most obvious of things depending on which window you are viewing, and also which layout is being used. I will demonstrate the two most common ways to add a plug-in to a channel, and also the way to get the layout to reflect mine if it does not already. I am using ProTools M-Powered 7.3.1 in these images so you may see something slightly different if you are using ProTools 8, however the techniques are exactly the same.
 The easiest way to add a plug-in to a channel is to use the Mixer window as you can access all of the inserts, input options, output options, levels, everything related to a channel with the exception of the actual audio. With the mixer window open click on the arrow next to an insert as shown in the image.
As you can see I have chosen to add a plug-in to the Audio 1 channel which is a mono channel, if you have selected a stereo channel then you will see some slightly different options where plug-in is displayed in these menus however they are very obvious what they mean. The next thing to realize is that the plug-ins in these lists are all RTAS plug-ins, you can not add an Audiosuite plug-in directly this way and they process the track at once, not in real-time as RTAS plug-ins do. The difference is explained in another post on here so I will not go into that in this post, if you don’t understand the difference and what should be used where, please have a look at “The ProTools plug-ins mystery solved” post.